5 DO-IT-YOURSELF CAR FIXES


While driving into an oil change may not appeal to everyone, there are less messy car care routines that can save you money and time spent waiting at a shop. Your mechanic or a repair professional is available to discuss and demonstrate the following:

 Replace Your Wipers
Thanks to our extreme temperatures, it can seem like we replace wipers more than we use them. As the rubber rests against the windshield in the sun, it can bond to the glass. When you finally turn them on, they can break apart or streak across the windshield. No tools are needed to replace and you may even be able to avoid buying new and just use a little vinegar instead.
Check your fluids
It may feel strange the first time, but it takes little effort and can alert you to potential problems early on.

Replace (some) bulbs and fuses
Dealerships make a lot of money by marking up bulbs and fuses. Your owner’s manual will tell you what to buy at an auto parts store. Review the instructions, grab a screwdriver and you’re good to go in some cases. In some cars, the bulbs may be more difficult to access and you’ll want to leave it to the pros.

Check your tires
While we recommend investing in a tire gauge, you don’t even have to do that. You can sometimes find a free air pump and gauge at a gas station. The biggest savings from this monthly Do-It-Yourself maintenance is increased fuel economy thanks to properly inflated tires. Plus, there’s a big safety benefit to traveling on properly inflated tires.

Clean your car
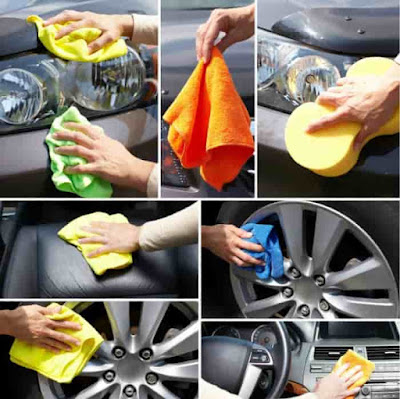
Regularly (and properly) using soap, water and wax will extend the life of your vehicle.

HOW TO CHANGE A TIRE IN JUST A FEW MINUTES

Knowing how to safely change a tire should be a skill that every driver should learn. You never know when you’re going to be stuck on the side of the road! Knowing how to properly change a tire can save you a lot of time, hassle and money.

 
1.   Find a safe and level place to stop. Make sure you are far enough off the road to be able to safely change a tire. Put your car in park and make sure you use the emergency brake as well. Refer to your vehicle’s manual to locate the spare tire and necessary tools within your car;
2.   Chock a wheel. Wheel chocks are wedges of sturdy material that are placed closely to the tire to keep it from accidentally moving. You can use something large, like a rock, tree limb, or anything more than a few inches high. Place it against the tire diagonally opposite from your flat to brace your car and keep it from rolling;
3.   Loosen the lug nuts. Place the lug wrench on any lug nut with the handle facing left. Push down on the wrench as hard as you can. Only loosen each of them one turn, “do not remove any of them yet completely!”
4.   Jack up your car. Use your owner’s manual to find the correct location to place the jack. Expand the jack by hand until it’s as tall as it can be and still fit under the car. Insert the jack handle according to the manual’s instructions;
5.   Start cranking. Lift your automobile high enough that the flat tire can be replaced with a fully inflated spare. Keep everyone else away from the car while it’s on the jack;
6.   Remove the damaged tire. Remove the loosened lug nuts, and take the wheel off. Put the wheel off to the side, not in the car while it’s jacked up. You don’t want to risk the car falling off the jack;
7.   Put on the spare tire. Line the lugs up with the holes in the wheel and gently slide the replacement tire on. Screw on the lug nuts by hand, tightening them as much as you can, do not use the wrench to tighten the lug nuts yet. Then lower the car off the jack until it’s firmly on the ground;
8.   Tighten the lug nuts. Now that your vehicle is safely on the ground, use the wrench to tighten the lug nuts by placing it on any nut with the handle facing to the right. Repeat on the other lug nuts, using the full force of your weight on each one to tighten securely.
Once you’ve completed these steps, you’ll want to double check that the lug nuts are tight, and consult your owner’s manual for important details regarding the maximum speed and travel distance for driving on a spare tire.

10 MOST IMPORTANT SPRING CAR CLEANING TIPS

If you do not know these important spring car cleaning tips, your car may not be ready for the road trips you plan to take. Each spring, take the time to tune up and rev up your car to make sure it has the ability to help you enjoy the outdoors in the coming driving season.

The 10 Most Important Spring Car Cleaning Tips You Need to Know, As the sun warms up, you may feel the need to roll up your sleeves and to tackle the big task of cleaning and tuning up your car. Getting rid of the winter mess inside and on the outside of your car is critical. The following are the 10 most important things you should do:
1.      Carpeting and Upholstery: Focus first on the interior carpeting and upholstery. Using a damp towel, wash down the seats. Get rid of any rock salt debris, mud or dry dirt on the carpeting using a carpet-cleaning machine, if possible ;
2.      The Console: Wash the consoles carefully. Avoid getting electrical connections wet, but do wipe them down appropriately. Clean out cup holders, too. Use a wet cloth to get the top of the dashboard, but be careful to dry it thoroughly ;
3.      Organize: Clean out the compartments. In your rush to get inside and out of the cold during the winter, you may have debris, trash or just too much stuff in the car. Get the compartments cleaned out and organized ;
4.      The Windows: Shine the windows. After all that winter driving, the windows will need a bit of extra attention. Clean the inside and outside using a window cleaner. Shine them with a dry towel. Do the mirrors of the vehicle in the same way ;
5.      The Trunk: Check the trunk of the vehicle next. Clean out the wintertime mess. This is also a good time to make sure the spare tire is in good repair. Be sure your emergency kit is in order too. Vacuum the trunk out ;
6.      The Exterior Body: Look at the exterior of the car. A good car washing is often in order. Make sure the first spring car wash is a thorough one that gets the winter grime out of cracks and under the edges. Use a soft towel and a mild detergent to wash the vehicle down ;
7.      The Wheels: Pay some extra attention to the wheels. Remove the hubcaps and wash them down. Scrub the tires and wheel wells thoroughly. This is also a good time to check the tire pressure and to tighten up any loose lug nuts ;
8.      Under the Hood: Look under the hood next. Leaves, debris and even dirt can get into the engine area. In some cases, just wiping down the edges is enough. In other cases, you may need to consider having the engine wiped off or professionally cleaned ;
9.      Waxing: Waxing the exterior of the car is a good idea, as long as you do so out of direct sunlight. Choose a spray or liquid wax for the best results. If you are using a new product, test it on a hidden portion of the car's body to ensure it works properly ;
10.  Replace Wipers: After a harsh winter, many vehicles require new windshield wipers. Having wipers in good working order is necessary, especially during intense spring showers.

Take an afternoon to detail clean the car. Doing so will make sure the vehicle is in the best condition possible for the upcoming summer months.

Maintenance Considerations
While these ten tips for spring cleaning are important, springtime also brings the need for maintenance and tune ups. Focus on the following areas:

-         Get the oil changed as needed ;
-         Tune up the engine to ensure it is working at its best. This includes having belts checked ;
-         Have the air conditioning tested ;
-         Be sure all lighting systems, both on the exterior and interior of the car, are working properly ;
-         Replace tires if they no longer hold air properly.

These tips will enhance the function of your vehicle. These, along with the spring car cleaning tips above, will ensure your car is working and looking its best throughout the spring and well beyond.

HOW TO CALCULATE STOPPING DISTANCE ?


Stopping distance is one of the most crucial aspects of car safety and takes into account all sorts of variable factors.
In this article, we talk about what exactly stopping distance means and how you can calculate it under various conditions.

What is stopping distance?

Stopping distance refers to the distance a vehicle will travel between when its brakes are fully applied and when it comes to a complete stop.
The Driver and Vehicle Standards Agency (DVSA) has laid out current estimate lengths a car is expected to travel when stopping at various speeds. These stopping distance measurements factor in what are called the thinking distance and the braking distance.
As the names suggest, the thinking distance refers to the distance a vehicle will travel when the driver thinks to apply the brakes and takes this action. The braking distance refers to how far the car will travel while slowing eventually to a standstill once the brakes are applied. The thinking distance is estimated at one foot for every mile per hour (mph) you’re travelling at.
For those currently learning to drive, knowing the average stopping distances for cars is useful, since questions on this matter are included in the DVSA’s current question bank for the theory test.

What is the stopping distance at 70mph?

It is estimated that on a typical, dry road, a typical car travelling at 70mph has a stopping distance of 96 metres or 314 feet.
To add some more perspective to those figures, this stopping distance is measured as the equivalent of 24 car lengths. If you were to line up 24 cars together single file, then the length these would cover would be virtually the same a car would cover while stopping from 70mph.
The 96 metres needed to stop a car at 70mph includes 21 metres needed for thinking distance and 75 metres for braking distance.

What is the stopping distance at 60mph?

A car’s stopping distance while travelling at 60mph is estimated at 73 metres (240 feet) or 18 car lengths in total.
This figure combines 18 metres for thinking distance and 55 metres for braking distance.

What is the stopping distance at 50mph?

A car’s stopping distance while travelling at 50mph is estimated at 53 metres (175 feet) or 13 car lengths in total.
This figure combines 15 metres for thinking distance and 38 metres for braking distance.

What is the stopping distance at 40mph?

A car’s stopping distance while travelling at 40mph is estimated at 36 metres (118 feet) or nine car lengths in total.
This figure combines 12 metres for thinking distance and 24 metres for braking distance.

What factors affect stopping distance?

As noted above, speed is an obvious influence on a car’s stopping distance, but weather conditions also majorly alter distances.
Groups like the DVSA estimate that whatever speed a car is travelling at, the overall stopping distance will at least double if you’re driving in wet conditions. If the weather conditions are icy then the overall stopping distance will be at least ten times the average figure.
So if, for example, you are travelling at 50mph in your car and the road is wet, you’ll want to double the standard figures given for stopping distance.